
In the visually driven world of interior design, elevations bring the project’s vertical dimensions to life. These detailed drawings are pivotal in visualising and planning both the aesthetic and structural elements of a building or space.
Interior and architectural elevations, by providing a side view of structures, reveal the nuances that floor plans cannot capture, making them indispensable tools for designers, clients, and builders alike.
The Essence of Elevations
Elevations are architectural drawings that show the façade or a vertical depiction of an interior wall. They are essential for depicting the design, materiality, and proportions of walls, doors, windows, and other elements. By offering a flat view of a building or an interior space, elevations provide clarity and detailed understanding of the project’s design intent.
Detailed Visualisations

Interior and architectural elevations allow for a comprehensive view of the project’s vertical aspects. These drawings serve as a detailed guide that showcases the height, length, and decorative details of the walls, as well as the proportions of windows and doors. This visualisation aids in ensuring that all design elements are harmoniously aligned and aesthetically pleasing.
Construction and Communication
Elevations are vital during the construction process. They provide builders with clear, scaled information about every facet of the building’s exterior and interior walls. This detailed guidance helps in reducing errors and improving the efficiency of the construction process. Moreover, elevations facilitate effective communication between the design team, the client, and the construction crew, aligning all parties on the project’s specifics.
Crafting Interior and Architectural Elevations
Creating an elevation drawing is a meticulous process that involves several key steps:
Tools and Materials
For Hand-Drawn Elevations:
- Drafting table: Provides a stable and suitable workspace.
- T-square and drafting machine: Essential for drawing horizontal and vertical lines accurately.
- Adjustable triangles: For drawing angles and diagonal lines.
- Architectural scale: To ensure that all elements are correctly proportioned.
- Quality drafting pens: To produce clean, crisp lines.
- Erasers and correction fluid: For making necessary changes.
For CAD Elevations:
- CAD Software: Programs like AutoCAD, Revit, or SketchUp.
- High-resolution monitors: To clearly see details.
- Plotter or high-quality printer: For producing large-scale prints.
Steps to Create Elevations
1. Gather Information:
- Base information: Start with accurate floor plans and sections. These will provide the necessary information on wall lengths, heights, and other structural elements.
- Site details: Include relevant site information that could affect the elevation, such as adjacent buildings or varying land levels.
2. Drafting Preliminary Sketches (Both Methods):
- Sketch by hand: Use light pencil marks to outline basic shapes and elements.
- Use CAD for rough drafts: Set up initial layers and use simple lines to block out shapes.
3. Set Up Your Drawing:
- Hand-drawn: Secure your paper on a drafting board. Use a T-square to draw a datum line that represents the ground level.
- CAD: Set up your drawing file with appropriate layers, units, and scales. Import the floor plan as a reference to ensure accuracy in wall placements and window heights.
4. Draw the Vertical Elements:
- Structural walls: Represent these first, as they are critical for the overall drawing.
- Windows and doors: Indicate openings using correct symbols and dimensions.
- Built-in features: Include cabinets, fireplaces, and other relevant details.
5. Add Material Textures and Symbols:
- Hand-drawing: Use different lineweights and hatches to represent various materials like brick, stone, or wood.
- CAD: Apply fill patterns and textures. Ensure these are scaled properly to represent the materials realistically.
6. Dimensions and Annotations:
- Clearly dimension: Show heights from floor to ceiling, heights of openings, and heights of any significant features.
- Annotate: Provide details about materials, finishes, and any special instructions.
7. Detailing and Depth:
- Shadows and depth: Adding these can help the elevation appear more three-dimensional and lifelike.
- Detail small elements: For intricate components like molding styles or decorations, detailed zoomed-in views may be necessary.
8. Review and Revise:
- Peer review: Have another designer review your drawings for accuracy and clarity.
- Client/stakeholder review: Present the elevation to all relevant parties for feedback.
9. Final Presentation:
- Hand-drawn: Trace the final draft with ink on a clean sheet or on tracing paper. Use markers or watercolor for presentation if required.
- CAD: Use print settings to ensure the highest quality output. Consider rendering the elevation if the software and skills allow, to give a more realistic preview.
Digital Revolution in Elevation Drawings

The advent of digital tools has transformed the way elevations are created and utilised. Software like AutoCAD, Revit, and SketchUp allow for more precise and detailed elevation drawings. These tools enable easy modifications and real-time updates, which are crucial during the design development phase.
Conclusion
Interior and architectural elevations play a critical role in the design and execution of architectural projects. They not only ensure that the design is structurally sound and aesthetically pleasing but also facilitate a smooth construction process through detailed documentation and clear communication.
In today’s digital age, the integration of advanced drafting tools has further enhanced the prevision and efficiency of creating elevations, marking a significant evolution in architectural design practices.
Elevations, therefore, are not just technical necessities but artistic expressions that bring the designer’s vision to the forefront, ensuring that every vertical surface contributes to the overall harmony and beauty of the space.
Next week, we’ll go into even finer detail, looking at detail drawings.
See you then,
JG x
Get new content delivered directly to your inbox
-
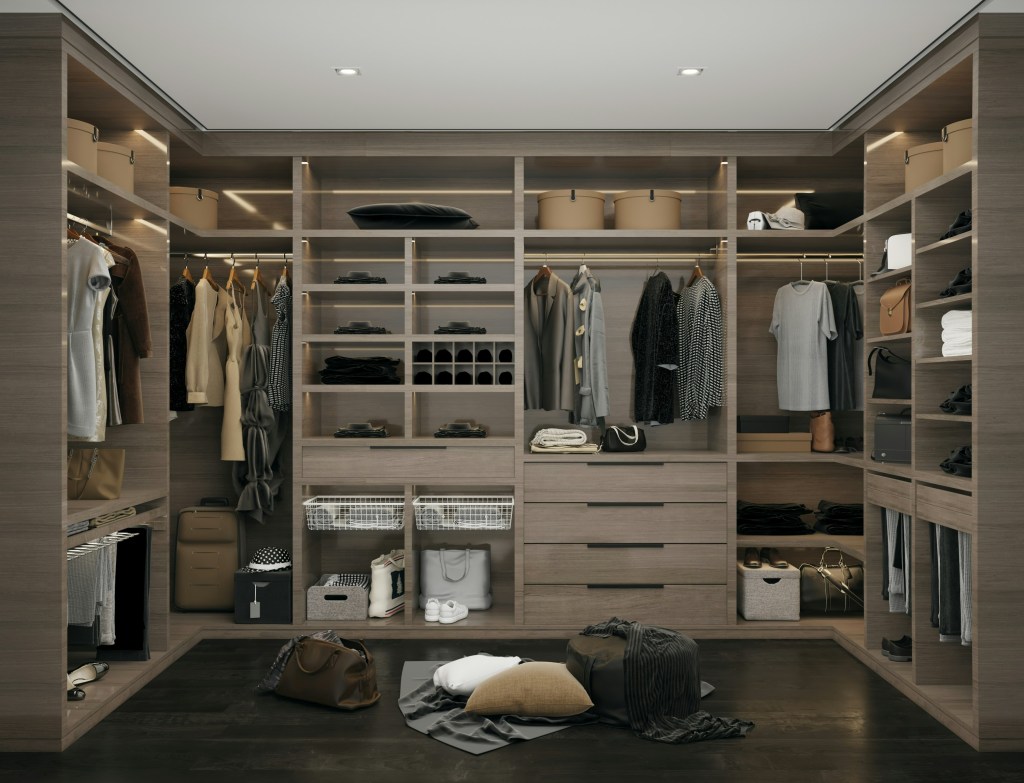
The Interior Life of the Closet
A psychological dissection of the storage lie. This essay argues that the modern obsession with seamless, integrated, invisible storage is an architectural attempt to deny our consumerist reality. We critique the walk-in wardrobe as the last sanctuary—the only truly private room remaining in the open-plan home—where the inhabitant is finally permitted to hoard, display, and…
-
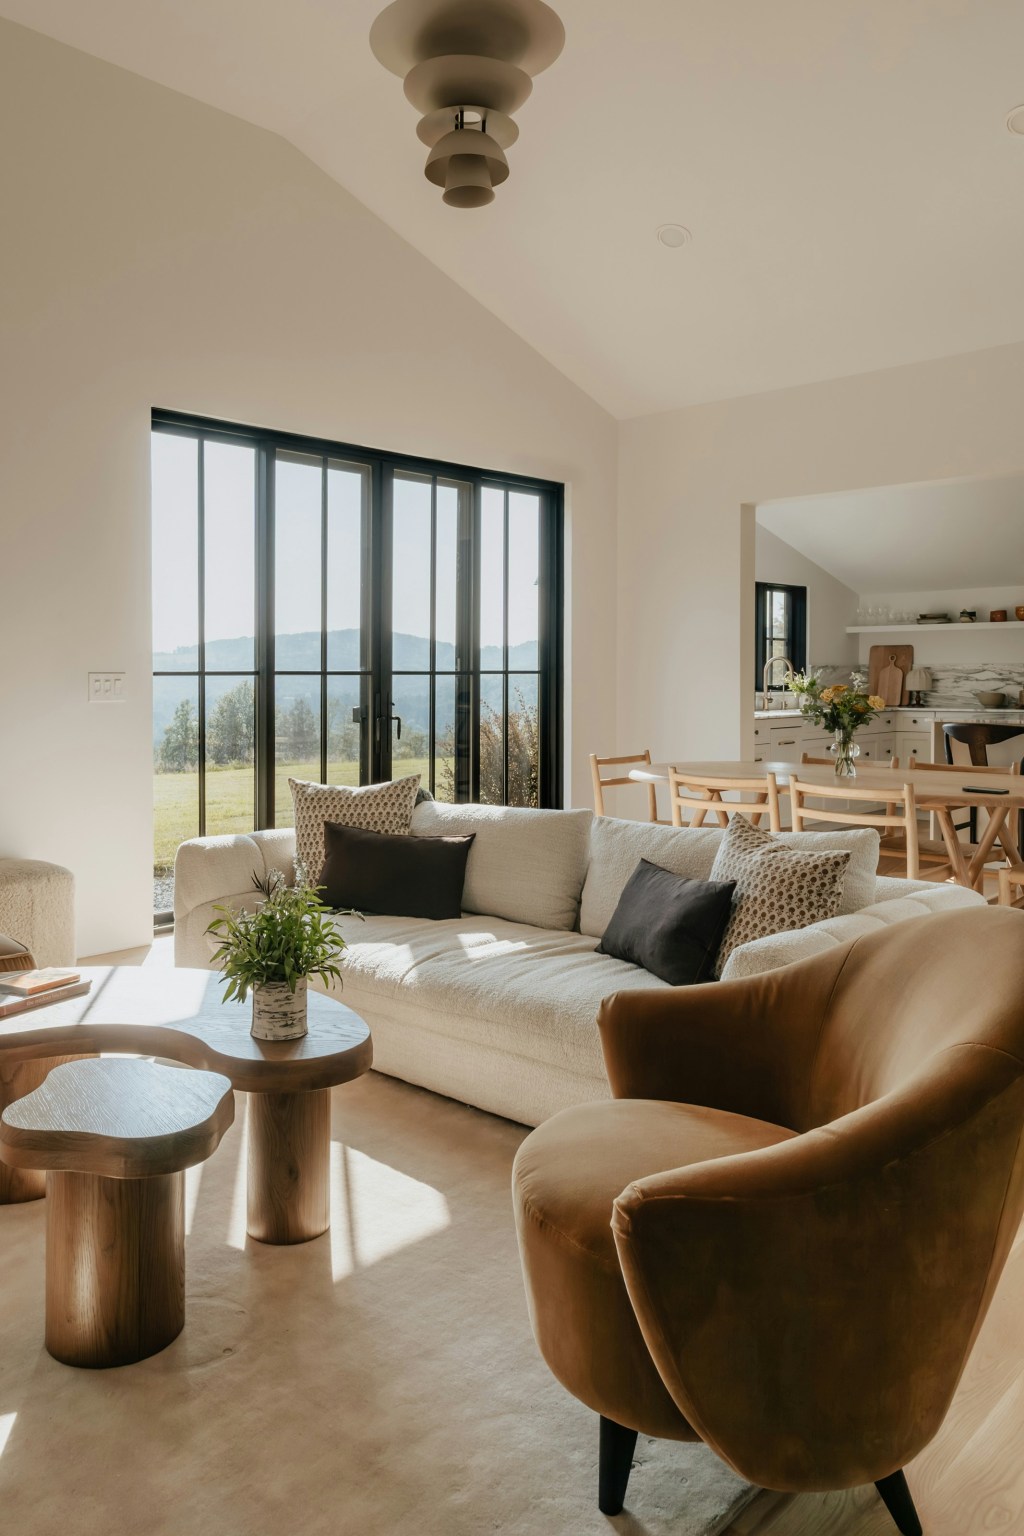
The Anxiety of the Open Concept
A ruthless dissection of the modern open-plan home. This essay argues that the dissolution of walls is a symptom of a society that prioritizes surveillance and perpetual productivity over the right to privacy and retreat. We critique the open concept as an architectural mandate designed to keep family members, guests, and workers in a constant…
-

The Tyranny of the Pure Surface
A philosophical takedown of the pursuit of sterile perfection. This essay critiques the obsessive use of unforgiving, high-maintenance surfaces (Carrara marble, ultra-white quartz) in the modern kitchen. We argue that the material’s impracticality is the point: it’s a luxury status symbol requiring endless maintenance, serving as a constant, expensive performance of aspirational hygiene and total…

Leave a comment